Okay so to continue on from the last post I have some more pics for you. A couple more before and after(ish) pics and some pics of the first winter and summer. Also someone asked me if the after pictures that I posted were the finished state, the answer is no it is simply where I am at currently. I am still a ways of from having any of it really finished. (that is if I am ever satisfied with it)
Anyway on with the pics.
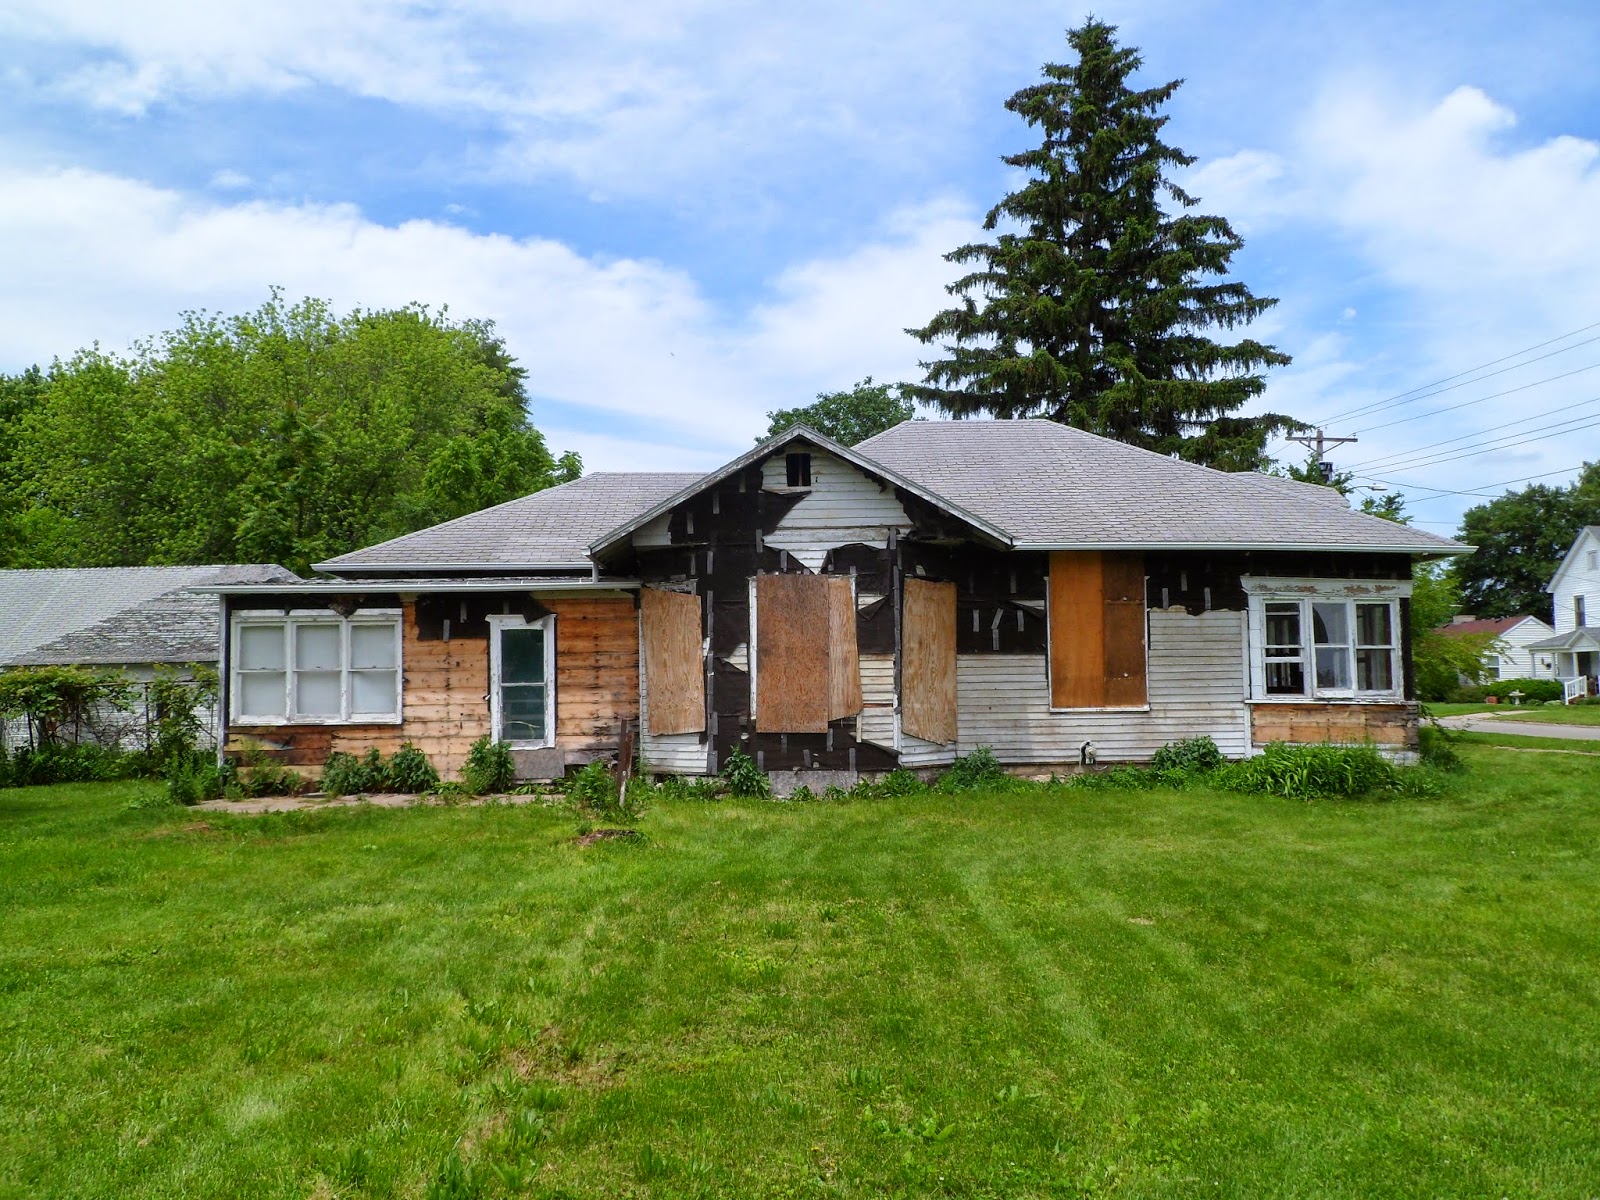
Before
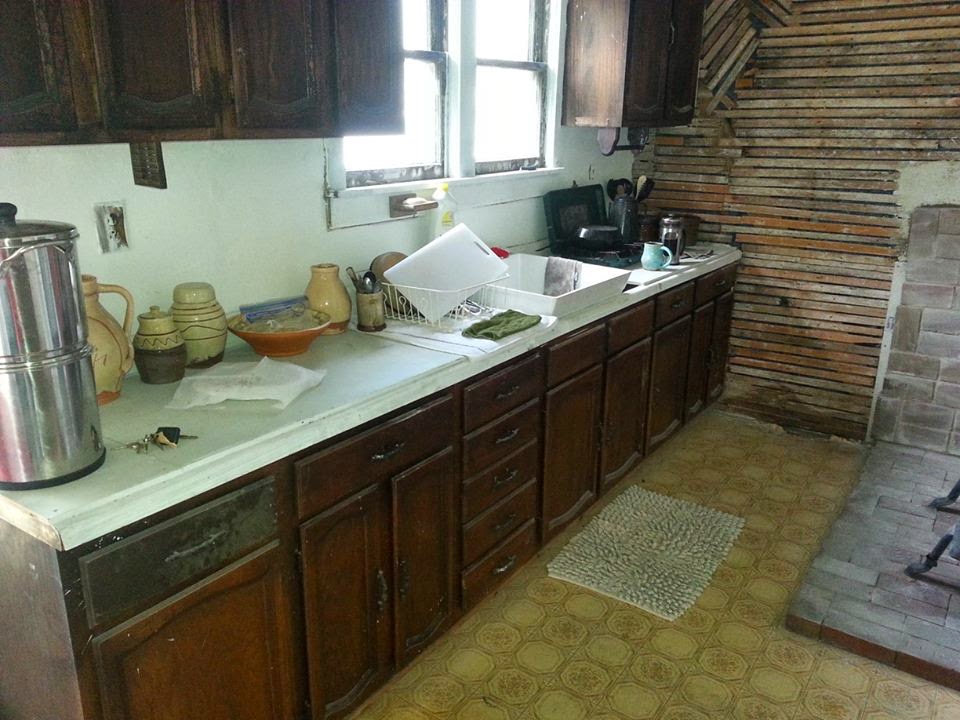
Kitchen After
My first "design" element on the house
And of course the first "meal" cooked is coffee
South Face before
Framing for the south facing windows
South Face with the windows installed.
Living room with the earthen plaster scratch coat installed
First harvest... "wild" horseradish
Insulated battery box for the solar power system.
Second coat of earthen plaster installed. Loving the lighting.
October "before" the first winter
December "after" the first winter. Was so not prepared for this.
At least the cold makes tasks like removing this from the walls easier.
Spring finally arrives
Pickleopolis. Cukes loved it.
Garden beds done
Herb garden with wattle fencing from local willow.
This is where all of the sod that was removed for the garden beds went. "Instant" hedge.
Hedge with willow planted.
First of the spring veg beet root. LOTS of beet root.
The first cooked meal from the garden, greens, onions, and radishes
Carrot Love
This is why I love heirloom varieties... ugly but OH SO GOOD
Heirloom corn getting a bit tall
Baking bread without an oven
Digging the footer for the new oven.
Using up some more of the sod. she loves it in here during the summer. It is easily 15 degrees cooler.
Onion Harvest and learning braiding.
Okay that's it for today. Tomorrow should catch us up to the present and thoughts on what I have learned so far.
Okay so...
Anyone who knows me knows that I am a BAD blogger. I have a problem with updating regularly, even when I have access to the internet regularly, and at the moment my access is spotty at best.
BUT that does not mean that I haven't been busy. So here are some pics. Where possible I am going to give you before and after pics so that you can get an idea of the progress
The siding on the front of the house is done. Cedar siding and the shakes are made from pallet wood rejects from a local sawmill that I get for $5.00 a ton.
South side siding almost complete, note the temporary green house.
Earthen plaster finished(ish), not totally finished with the rest of the house so the quilt helps keep the heat in the lived in sections.
Trying my hand at making maple syrup from my maple tree.
Gonna end this for now so I can get some more work done. More tomorrow(?)
Hey everyone, I wanted to remind you about the fund raising campaign that I am running. I am raising funds to help in the renovation of a Victorian era home. I will be doing this renovation myself using sustainable building techniques and green building materials. And best of all I will be documenting the whole process and posting how-to videos and pictures online. My goal is to show that almost anyone can do this themselves and still meet common building codes. I want to show everyone how they can have a beautiful, healthy, and efficient home that is sustainable. Please help me out by donating if you are able, by sharing this link with family, friends, and co-workers and asking them to help out, or both. We are over halfway through the campaign. Check out the campaign page and see some of the wonderful perks that I am offering for donations including handmade custom pottery, handmade metalwork, and some amazing artwork. http://igg.me/at/newmoonhouse/x/3772293 Just in case you haven't seen it yet:
Welcome back everyone!!
It has been a busy week at New Moon House. I have been up at the property getting everything ready to move up there, as well as getting some yard maintenance done. The grass had been neglected pretty much all spring and summer and as a result was kinda out of control and knee high. Luckily enough I got it taken care of before the city decided to motivate me monetarily. I also got the area designated for the late summer/fall garden.
My main goal on this trip was to get the garage ready for habitation. I did get it ready for me to move my stuff into, but there is going to be more work involved in getting it ready for winter. I framed in one of the garage doors and installed a door with a real lock as opposed to the previous owner relying on cheap padlocks and stuck doors.
I also wanted to get some of the "utilities" sorted out. I started out with getting the solar system up and running temporarily. My main goal for the temporary run was to test to see how much sun and power I could expect from the system in its various locations and whether or not I was going to mount it on the roof or keep it in a ground location.
I decided that although the ground area that I was considering received around 9 hours of direct sun during the day, I would greatly benefit from a roof mounted system which is in direct sun almost completely from sunup to sundown.
I also chose a location for the battery box/charge controllers. It is in an out of the way location that will still allow me to use a short length of heavy duty power cord with 2 male ends to tie the inverter directly into the existing wiring in the garage. This will save me the trouble of running a bunch of new wiring and all I will have to do is add some switches in to isolate areas rather than the current all on/all off setup.
I got the beginnings of the rainwater harvesting system worked out and dry fit together. I still need to get the gutter purchased and installed on the garage and tie that into the collection barrels. Plus glue everything together but I am happy with the way the system came together. It is easily expandable and will almost certainly benefit from doing so. I am confident that with a seriously conscious effort I can make the 110 gallon system work but in truth I would feel better with more capacity and I would like to see it grow by another 4 barrels eventually. I will definitely be relying on greywater for plant watering, and possibly figuring out a way to reuse it for something else as well, clothes washing perhaps.
I also got the overflow location sorted out as well. This is important since the lack of an overflow would almost certainly cause me major problems in the future.
The last "utility" that I had to deal with was waste collection. I had already decided that I was going to use the "sawdust" style of composting toilet. I have had plenty of experience with the system and I know that it works. The system has as much variety in the way that it is set up as an ice cream shop has flavors. I have seen systems that separate urine and isolate it, systems that collect it all in the same place, even systems that are nothing more than a 5 gallon bucket. They all work equally well in their own way. The system that I chose to go with is the dry composting system. This type of system works by separating the urine from the fecal matter. I am doing this by utilizing 2 closed systems. A closed and sealed box which holds the 5 gallon bucket for feces and sawdust which is vented to the outside, and a "flush" urinal system. The urinal system uses a tight sealing 2 gallon bucket, some vinyl tubing, and a funnel. It even makes the flushing noise!!!
Both systems exceed my expectations at how well they work. They are completely odorless, I knew from experience that the composting toilet was for the most part odorless, but that occasionally could develop some smell. And urine going stale produces an unmistakable smell that tends to linger. After living with these components for 4 days I can say without a doubt there is no odor whatsoever. I suspect that the vent on the toilet is going to be an unneeded precaution.
I will have to find a way to make allowances for female guests if the need arises, perhaps it will give me a reason to throw some chamber pots.
As I said I framed in the first of the 2 garage doors. I chose to use 2x6 lumber to accomplish this so that I could go back and insulate the whole thing with light clay straw which will then get some earthen plaster over the inside and some sort of siding outside.
Outside I got a compost "bin" built. This is not the permanent style or location, but the sheer amount of compostable material that the yard cleanup produced made it necessary.
I feel I should point out that this is only 2 days worth of material and was somewhat compacted already.
Adding to the pile are the weeds that were threatening to overtake the grapevines that grow next to the garage. That is not to say that the grapes aren't out of control as well.
I know for a fact that the only sure way to preserve grapes for later is to ferment the juice... Yay homemade wine.
Well that is about it for this week, next week I will be moving in. I will be doing video for the permanent solar installation as well as for the rainwater system. I will also be getting the garden in and dealing with the second garage door.
Here is this weeks video that goes along with this post.
I also want to remind everyone that I am still running the fund raising campaign to help with the renovations of the house. You can find the link to the campaign here: New Moon House Fundraising Campaign. Please help out if you can.